Thursday, March 6, 2014
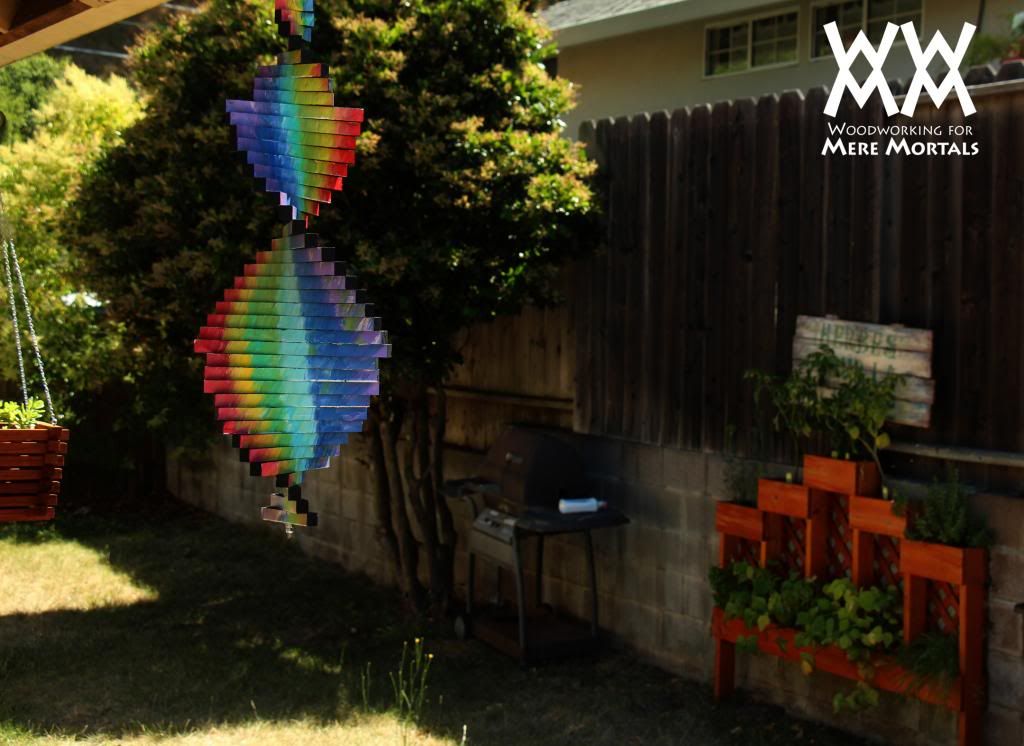
Easy to make wooden wind spinner
Woodworking options
For mine, I used stock 3/4" pine boards and ripped them into 3/4" strips, which I then cut to various lengths. This was all very simple on my table saw but if you dont have one, you might be able to find thin strips of wood at your local home center that will do the trick. You can cut them to length using a hand saw or jig saw.

Hardware
I used a length of 1/4" threaded rod and attached an eye bolt to one end using a coupler. I locked these into place with a thread sealant (Loctite) and attached a swivel clip to the top. We havent had any strong winds since I built this but I would like for it to spin in slight breezes, so I am going to try a barrel swivel instead and see if that spins better. You can find these at sporting goods stores: fishermen use them to attach lures to lines.
Get creative!
The fun of this project is really in the decorating and painting. I chose to make a rainbow pattern on mine because I like bright colors and wanted this to contrast with all the earth tones outside. This would be a great project to get the kids involved!
*****
Subscribe to:
Post Comments (Atom)
No comments:
Post a Comment